Trash Boom | Floating Containment Booms

An interesting product for many of our customers is the debris and trash boom. Similar in design to an oil boom or silt barrier, many customers wonder what exactly these booms can be used for and if their conditions are applicable for the boom.
floating trash barriersIn general, the Floating Debris Boom is a highly versatile containment option used to control floating debris, trash, small timbers, branches, seaweed, aquatic plants and more.  Similar in design to an oil containment boom, standard design for these booms will include the following:
  • PVC Fabric
  • Section Lengths (50 or 100 feet)
  • Short Skirt
  • Ballast Chain
  • Flotation Collar
These highly adaptable booms are used in multiple water conditions to contain items that are floating in or potentially causing harm to surrounding areas. Booms have been used to contain a wide range of options, with some common applications including:
  • Aquatic Plant Containment
  • Intake Protection 
  • Entrance Control
  • Dock Debris Containment
  • Containment of Debris in Rivers
  • Shoreline Debris Containment
  • Ice Containment
  • Demarcation in Swim Areas
  • Seaweed  Containment
  • Jelly Fish Containment
  • Floating Log Containment 
  • Lake Debris Protection
  • Trash and Pollution Control


Common Debris Boom Questions

In addition to questions regarding applications and locations for these booms, commonly asked questions also include the following:
Question: Does the debris boom only come in yellow?
Answer: No. Due to its frequent use among plants and aquatic life, booms can also be made in darker colors such as black, green or blue.  Yellow is the standard option due to visibility requirements for use in locations with water traffic.

Question: What conditions can a trash boom be used in?
Answer: Similar to our other booms and barriers, the debris boom is available for multiple  water conditions including moving currents, calm waters, and some tides. Anytime you are looking for debris boom, silt barrier, oil boom, or other pollution control device, it is always helpful to provide your water conditions. This helps us to help you with anchoring requirements or other deployment issues you may need to consider.
For more information on the debris boom, please check out the Trash and Debris Boom Page.

Small Drug Incinerators | Safe Disposal for Drugs

Drug Disposal Problems

As regulations regarding drug use, prescribing and dispensing have increased in various states, many police stations and governments are looking for a way to safely dispose of all their collected drugs. With budgets playing a large factor into methods and considerations, the problem of safely disposing of these materials can be both difficult and expensive.

Rather than turn to contractors for incineration and disposal, many departments (such as the one shown here) are considering purchasing a small incinerator for an internal incineration process.

The Small Scale Drug Incinerator

Small scale incinerators can refer to many different products, but most commonly refers to portable units or units that use a drum or barrel as part of their incineration process. This helps to lower costs and provides a reliable container for storing and disposing of drugs.

In terms of law enforcement, there are several features located on many of these incinerators that can help make the process fast, easy and efficient. These features include:
  • Locking Disposal Box: Many Drug Incinerators (including the one shown here) include a metal locking box designed to safely load the incinerator. This not only helps to place drugs safely into the incinerator, but also keeps drugs safe until disposal.

  • Easy Incineration Process: These incinerators are typically placed into operation through the use of both electric and natural burning processes. Incinerators are typically hooked up to an electrical outlet (through the use of extension cord) to supply air and increase incineration. Fires within the drum can be started using several pounds of wood. Once a fire is started, air is added to the unit to increase flames.

  • Portable: The final advantage of many of these incinerators is simply their portability. Unlike big or bulky incineration units, these models can be moved in and out of the station as needed. 
With incineration costs on the rise and a continuous supply of drugs being confiscated, the portable drug incinerator can be an excellent investment and easy way to dispose of drugs for years to come.

Spill Containment Products | Secondary Containment Berm

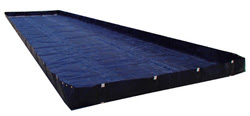
Containment Berm for Oil When working on oil fields or mining locations, there are often several items that have the potential to leak while in operation. One way to deal with this issue of secondary containment is through the use of the secondary spill berm. Unlike a liner or other ground protector, the spill berm often includes walls that help to completely contain liquids that may leak or seep out of various parts.

Secondary Containment Berm Structure

A secondary containment berm can come in many different styles or constructions. Some berms require a manual installation of the aluminum angle brackets, while other berms simply include foam walls that can be driven over. In general, a berm will typically include a liner and berm wall that allows for complete containment of your products.

Secondary Containment Berm in Oil Fields

While the secondary spill berm is available in several different styles, a great option for oil fields would be the aluminum angle model. When dealing with leaks or machinery, the aluminum angle berm can offer the increased benefit of rigid or firm walls that help to properly contain liquids that can leak from valves, hydraulic lines, or pumps. Additionally, berms offer long-term use that helps to successfully contain items for extended periods of time.
During hydraulic fracturing or other oil, gas, and mining operations, berms can be used in several different areas under parts, tools, storage vessels and more. Containment berms have been placed in many locations including under the following:
  • Pumps
  • Valves
  • Storage Tanks
  • Frac Tanks
  • Water Tanks
  • Vehicles
  • Machinery
  • Tools

Aluminum angle berms have been used as a drive through unit by adjusting a wall of the berm to allow vehicles to drive over the unit. In order to drive your vehicle onto the containment area, aluminum angles would need to be removed from the entrance wall of the berm. This will allow the wall to lie flat for vehicles to drive over. Once your object is in place, angles can be inserted back into the wall to reform the berm wall.

Benefits of a Containment Berm

The spill containment berm is an economical way to help you stay in compliance and protect liquids from seeping into the ground during the oil field process. When compared to other ground liners or secondary containment options, the containment berm offers the additional benefit of walls to contain large amounts of liquids.
Use of these berms can help protect the ground from pollution, quickly contain spills, and provide secondary containment for storage items.

Spill Containment | What are Oil Booms And How are they used?


As oil spills continue to occur in oceans, rivers, and lakes around the world, increasing environmental concerns are raised as to how to properly clean up and contain these spills. One of the most frequently used items during this process in an oil containment boom. These booms vary in variety and can include absorbents, flotations and more.

What is an Oil Containment Boom?

An oil containment boom is essentially a floating barrier that is deployed around spills to help temporarily contain oil as cleanup efforts are being implemented. These booms are wide-spread in their styles and can include the ability to absorb oil as it is being contained. The purpose of these booms is contain oil to prevent further spreading and contamination, as well as concentrate oil to a specific location to help ease cleanup process.


Oil Boom Styles:

Floating Boom: The floating boom is designed specifically to contain oil. These booms can be inflated with air, used with a built-in foam flotation device, or built with a net system.  These booms can effectively contain oil and prevent it from spreading to the surrounding areas.


Deployment Methods

When containing an oil spill, booms can be deployed in many different methods. Some of the most commonly used tactics include containment, deflection, and exclusion.


Containment: Oil booms used for containment are a common method for water locations that have moving water. These booms are placed around oil spills to contain them and prevent further spreading. Booms should be installed around the spill barrier and deployed perpendicular to the spill for the best level of containment.


Deflection: When containment is not possible, booms are often deployed for deflection. This method includes deploying an oil boom along a spill to deflect the oil to a desired cleanup area. Rather than deploying this boom perpendicular to the spill, these booms should be deployed at a slight angle to help move the oil to shorelines where it will be easier to manage and cleanup.


Exclusion: This type of deployment is used to exclude oil from polluting particularly sensitive areas. This can include areas like under bridges, marshlands or other water sources and wetlands. This type of deployment includes places booms around the area in need of protection, acting as a kind of barrier to prevent oil from spreading this location.


For more information on boom deployment, view Oil Spill Training.


Booms are often successfully used with a boom reel to both increase storage safety and speed up the deployment process.


Oil Spill Cleanup Products

After an oil spill has been contained to a specific area, cleanup often includes the use of several different oil spill cleanup products including skimmers, vacuums and absorbents. These products are typically used on the surface of the water to help absorb or skim oil for later disposal.


Dewatering Methods | The Dewatering Bag


Dewatering methods include a wide range of practices including settling ponds, basins, filtering rocks, and even dewatering skimmers. Today we will discuss the method known as the dewatering bag.


This Sediment Filtering Bag is designed to connect to outlet hoses or drains and filter water as it flows into the bag. The non-woven bag retains sediment and silt, while allowing only clean water to flow out of the unit.


Dewatering Bag Construction


Fabric: The dewatering bag is typically designed from a type of non-woven geotextile material. This needle-punched fabric has the unique ability to successfully retain several different fine silt and sediment materials, while still allowing water to flow out of the bag. This has allowed it to successfully function as a filtering device for sediment or sludge laden waters.


Sizes:  Choosing a filtering bag size is generally based on the amount of water being pumped through the bag, the rate at which this water is being pumped, and the type of sediment you are looking to retain.


Bag Placement: While bags are made from a reliable geotextile material, it is still important to consider the location in which you will be placing this filtering device.  These dewatering bags have been placed in numerous locations including some of the following:

  • 20’ Drop Boxes or Dumpsters: This is a common choice for people who wish to transport the bag or water to a different location.
  • Ground: These dewatering filter bags can be placed on ground while operating in a filtering process. Ground cloths are often placed underneath these bags to help support the bottom of the bag and protect it during use.
  • Permeable Surfaces: These bags can also be placed on porous surfaces such as hay bales to help decrease the amount of surface area needed for the bags and improve the bags performance.

Discharge Hose: To insert a discharge hose into your sediment filter bag, make a small incision along the edge of your bag. Hoses can be easily placed into these incisions and then sealed to the fabric by devices such as ropes, clamps, ties, and wires.


Dewatering sediment filter bags are a common choice for applications such as construction site dewatering, sediment removal in small ponds, and trench pumping. They are often used to keep your keep areas in compliance with NPDES and other stormwater regulations.


Debris Boom for Trash And Aquatic Plant Control


A floating debris boom deploys in the water to form a containment area in front of intakes, river openings, or around troublesome aquatic plant areas. These barriers keep debris and pollution in a contained section to prevent them from spreading or growing to other locations. These contained sections can be formed directly around the source of pollution, along shore lines, or around growing plants to keep them in a confined area. Some of the most common places you might find these booms include:

  • Rivers
  • Lakes
  • Power Plant Intakes
  • Ponds
  • Streams
  • Canals

Typical Design of a Control Barrier

Floating barriers have many different styles depending on the type of control you are looking to achieve. Some barriers feature construction from marine treated PVC, while other use galvanized or stainless steel. All booms contain some source of flotation device to work in water conditions.

These control barriers are typically designed to include a top flotation device, skirt, and chain ballast. This balance of floating and sinking keeps the barrier above the surface of the water, while simultaneously keeping the boom in place and functioning as a unified barrier.  Other models include a bottom net for extra bottom control.

The debris boom is one of the most versatile products available and can be used to control a wide range of plants and debris. Some of the most common items these booms work to control include:
  • Floating Trash
  • Tires
  • Plastic Bags
  • Small Timbers
  • Seaweed
  • Jelly Fish
  • Golf Balls
  • Logs
  • Ice
  • Hyacinth, Duckweed, & other Aquatic Plants

How these Barriers can Help Keep Waters Clean

One of the most prominent uses for these barriers is to help keep water areas clean and in compliance with the Clean Water Act and NPDES Phase II. Installing a barrier can help prevent pollution from spreading to wetlands and contaminating large areas of water.

This kind of containment makes polluted areas easier to clean and has saved areas millions in cleanup costs. To clean collected trash and debris, many people choose to use skimmers, pumps, vacuum trailers, and harvesters. See Debris Boom Products.

Turbidity Control for Water Areas


During dredging, piling, and other construction jobs, turbidity control can be essential to keeping your site in compliance and in control of the silt and turbidity produced by your activities. We’ve all seen the black silt fences around roadside construction, but many people wonder how to properly control turbidity in water-based applications.  Today, we will take a brief look at how the turbidity curtain works and what style is appropriate for use.


The turbidity curtain (also referred to as the silt curtain or floating silt barrier) is designed to form a protective barrier that contains turbidity and sediment to your site location. Barriers help to control the turbidity at the source and prevent contamination of waterways.


The floating turbidity barrier typically consists of a long curtain that extends to one foot from the floor of your water location. On the bottom of this barrier is ballast chain that helps to sink the heavy-duty material and keep the device in the upright position. The top usually contains a series of flotation devices that have been sewn into the top of the device. This balance of floating and sinking helps to provide complete coverage from top to bottom in your water location.


When looking for the right barrier to use in your construction location, there are many factors to take into consideration.  Factors include:

  • Water velocity: One of the major distinguishing factors in turbidity control is the waterway in which you will be working in. When demanding forces such as waves and wind come into play, the strength of your barrier needs to be increased to handle increased sediment pressure.
  • Site Conditions and Applications: As important as the speed of your water is site conditions such as the average velocity of wind, erosion control in your area, and general site functions.
  • Soil Type: If the soil you will be producing is contaminated, there is a need for increased turbidity control to prevent this water from entering other systems.
  • Project Duration: The length of your project is often a consideration for turbidity control. The longer your project lasts, the greater the potential for large volumes of sediment. Turbidity barriers need to be able to handle the water conditions in your location as well as the amount of sediment your area is producing.

The following is a brief overview of the three types of turbidity curtains:
  • Type 1: The type 1 barrier is meant for the least demanding applications. It has often been implemented in calm water applications or short term projects. It should not be used in water areas that have waves or high flow rates.

  • Type 2: The type 2 turbidity curtain is a favorite for mild water applications. It has been used during pile driving, demolition work, and silt control in fairly fast waterways. Companies typically recommend that the barrier not be used in water with a velocity higher than 1.5 knots or waves higher than 3 feet.

  • Type 3: As mentioned before, the type 3 turbidity barrier is high in strength for your strongest water applications. It is used in dredging, demolition, and dam repair.

You can also check out all models on this Silt Curtains Overview Page.

Hopefully, this has helped give you a start to understanding the turbidity control barrier. Controlling turbidity is an essential part to having a safe construction, dredging, or maintenance operation. Please don’t hesitate to look into these control measures when handling sediment on your site.


How Will You Celebrate Earth Day 2011?

 Earth Day 2011 (Friday, April 22) is coming in just a few days! Do you know how you are celebrating this year?
Let's be honest, we all love participating in Earth Day, but who has the time to go out and plant a tree, make a special stop at the recycling plant for a tour, or head down to the beach for a clean-up?
The International Erosion Control Associate comes to the rescue with their "Save Our International Land" (SOIL) Fund launched in 2008. The mission of the fund is to "provide a permanent funding source fro programs and projects that improve environmental quality through education, research, and applied technology."
In honor of Earth Day 2011, IECA is offering a quick and easy way to celebrate, by supporting the SOIL Fund. How can you help?
So if you can't make it outside or on site for celebration, take a minute and check out this opportunity to give back on such a special and utterly important day.

Turbidity Curtain Installation in 3 Easy Steps

Did you know that turbidity curtain installation can be done in 3 simple steps? Follow this simple guide for successful deployment!


Prior to installation, when unloading the curtains from the truck, DO NOT cut or untie the vinyl bundle straps before you place them down on the proper space. Find an area with adequate space near the shore where you can place each bundle approximately 15-10 inches apart from each other. At this point, it is safe to untie/cut the bundle straps.

Step 1: Attach the bottom chain of the silt curtain via shackle or snap hook for section one to the bottom chain or rind of Section 2.

Step 2: Slide together the aluminum extrusion and connectors of your type 2 or 3 turbidity curtain (SKIP this step for a type 1 curtain). Insert the toggle pin.

Step 3: Use the rope ties or heavy duty zip ties to tie one grommet eye of one silt barrier section to the aligned eye of the mating section. Repeat for entire skirt depth.

NOTES:
  • The turbidity curtain should be furled/reefed up to the flotation by tying a reefing line around the flotation log. This will make it easier to maneuver when towing to position.
  • When towing the curtain into the water, take care not to allow the curtain to become twisted.
  • Avoid sharp objects or areas that may damage the curtain when deploying it.

The Granite Environmental Blog Takes on Erosion and Pollution

Who is Granite Environmental and What Do We Do?
Granite Environmental is a small business located in the heart of Sebastian, FL.  Since 2006, we’ve been offering product solutions for a cleaner world. Specializing in erosion and pollution control products and site specific solutions for industrial spill clean-up applications as well as emergency use, we are a complete solution resource for all stages of the erosion and pollution project cycle:
-> Prevention -> Control -> Containment -> Recovery -> Disposal


Along with our product selection, Granite Environmental offers expert advice from trained technicians. Taking time to hear out your application or problem and developing an efficient and economical solution is what our team does best. We want to take that knowledge and experience to the next level by offering it to you in the form of a blog.  


Why Read The Granite Environmental Blog?
The Granite Environmental Blog will quickly become your trusted source for all things erosion and pollution. Not only will you have access to the latest news surrounding erosion and pollution, but you will also have the opportunity to increase your knowledge and hear real life experiences surrounding the world of erosion and pollution.


What Can I Expect?
With so much to cover, it only seems fitting to start from the ground and work our way up: Soil Erosion. We’ll take a look at the causes, effects, and solutions with our resident educator, Professor Loam. We’ll learn where and how it’s affecting our world in the present time with our news agent, Terra Firma. We’ll read personal accounts of how soil erosion can be tackled while on the road with Clay.


Ready to get down and dirty? Let’s talk soil erosion!